Generic Settings
All the FHIR components have the following common settings located on the component's Settings tab:
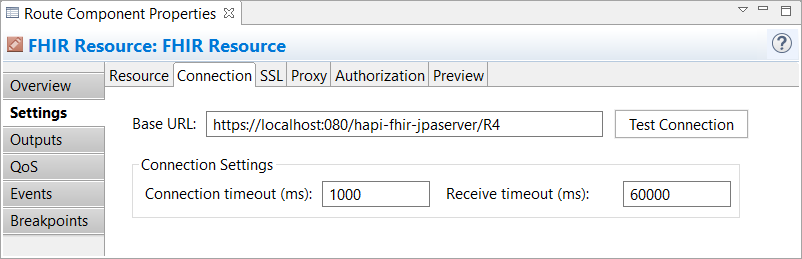
Connection
On this tab, you can specify component-level connection settings to connect to a FHIR server without using the XEServer FHIR service as a connectivity bridge. These settings are available if the Use connection settings from component option is selected.
| Base URL
|
The URL that should point to the target FHIR server's restful endpoint. All the operations use this base path as a prefix for building requests to the FHIR server. |
|
Connection settings
|
| Connection timeout
|
Specifies the time during which a connection to the FHIR server must be established. If the timeout time expires, the current XEServer message fails and goes to the error output. |
| Receive timeout
|
Specifies the maximum time to wait between two subsequent parts of the response. If the timeout time expires, the current XEServer message fails and goes to the error output. |
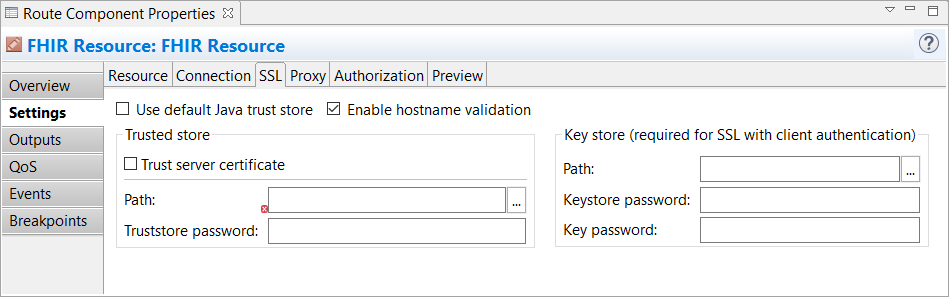
SSL
On this tab, you can configure the connection security parameters.
Warning DSA certificates are not supported as a result of migration to Java 11. For SSL connections, you have to use RSA certificates instead.
| Use default Java trust store
|
Select this option to get trust store certificates from the currently used Java installation when establishing the SSL connection. |
| Enable hostname validation
|
Select this option to ensure security by validating the host name. |
| Trusted store
|
| Path
|
Specify the path to the key store with trusted certificates. |
| Truststore Password
|
Specify the password to the key store with trusted certificates. |
| Key store (required for SSL with client authentication)
|
| Path
|
Specify the path to the file which contains key store certificates. |
| Keystore Password
|
Specify the password to the file which contains key store certificates. |
| Key password
|
Specify the password to the private key. |
Proxy
On this tab, you can configure HTTP(S) proxying for the service. The following proxy settings are available:
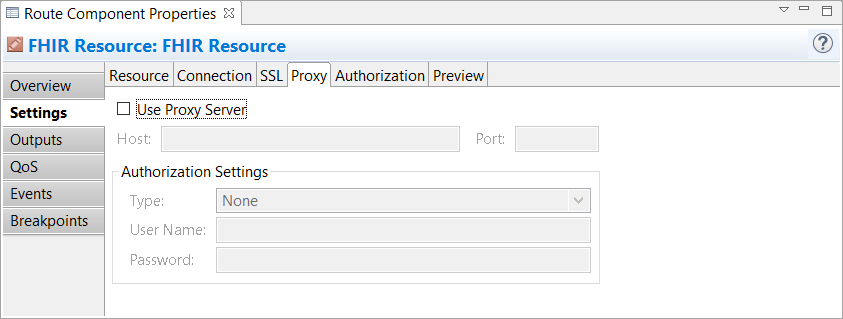
| Use Proxy Server |
Select this option to enable the Proxy Server. |
| Host |
The IP address or the host name of the proxy server to be used. |
| Port |
The port number to be used for the connection. |
| Authorization |
The authorization type to be used when connecting to the proxy server. The following options are available:
|
Authorization
On this tab, you can specify how the target FHIR server should authorize the XEServer's connection. If the Use connection settings from component option is not selected, then the following options are available:
- Service defined: In this mode, the component uses the authorization settings from the FHIR Service service.
- Token: In this mode, the JWT authorization token is used, this token is passed to the component as a property to enable access to FHIR resources. FHIR components allow you to set an Authorization HTTP header extracted from an EMR system. When the external EMR system sends a JSON file with a request for information that is returned as Hook Cards (for more information, see https://cds-hooks.org), to a FHIR server, the EMR system also provides an authorization token to access the FHIR server. You can set this authorization token to the HTTP Header while forming a response.
The following settings are available if the Use connection settings from component option is selected:
- Basic: In this mode, the colon-separated user name and password are encoded in a Base64 string and sent to the server within the authorization header.
- Digest: In this more complex and secure mode of authorization, the user name is sent as a plain text, and the password is sent as a hash code.
- None: No authorization is performed.
-
OAuth 2.0: In this mode, the client (XEServer) requests an authorization server (a remote server) to issue a unique temporary access token that is used to access resources on a resource server. The authorization server returns a unique access token. This token is then embedded in every request made to the target URI by the REST Client component.
 To use the OAuth 2.0 authorization mechanism, you have to specify the following parameters: To use the OAuth 2.0 authorization mechanism, you have to specify the following parameters:
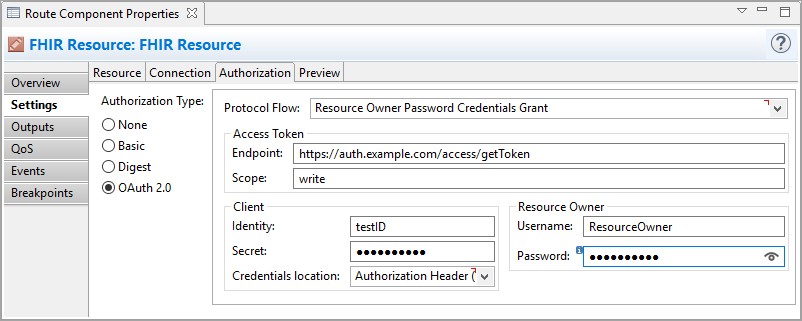
| Protocol Flow
|
Select the method of obtaining an access token from the authorization server. XEServer supports the following flows:
|
|
Access token
|
| Access Token Endpoint URL
|
Enter the endpoint URL of the authorization server. The REST Client component makes a request to this URL in order to obtain the access token. |
| Access Token Scope
|
Enter the scope parameter for the access token to be issued. The scope defines what type of access (for example - read, write) the client should have. |
|
Client
|
| Identity
|
Enter a unique string that is used to identify the client (XEServer) during registration on the authorization server. |
| Secret
|
Enter a password to protect the client's Identity. |
| Credentials Location
|
Select a way for client credentials (Identity and Secret) to be sent to the authorization server. The following options are available:
- Authorization Header (Basic Authentication Scheme): Select if you want the client credentials to be sent embedded within the authorization header in the basic authentication scheme.
- Form Fields (URL Encoded Form): Select if you want the client credentials to be sent embedded within the body of the request.
|
|
Resource Owner
Available for the Resource Owner Password Credentials Grant protocol flow only.
|
| Username
|
Enter the user name used for authorization on the resource server. |
| Password
|
Enter the password used for authorization on the resource server. |
- Token: In this mode, the JWT authorization token is used, this token is passed to the component as a property to enable access to FHIR resources. FHIR components allow you to set an Authorization HTTP header extracted from an EMR system. When the external EMR system sends a JSON file with a request for information that is returned as Hook Cards (for more information, see https://cds-hooks.org), to a FHIR server, the EMR system also provides an authorization token to access the FHIR server. You can set this authorization token to the HTTP Header while forming a response.
Preview
This tab displays a pre-built request to be sent including all the parameters you have specified.
|
|

